The IR Miniature

Posted by ZombiesRComng

Here's some information on the IR Miniature that I made to move the virtual mini's on the game map. It is a much better method of moving the mini's than the IR pen.


Parts List:
High-Output Infrared LED
SPST 0.5-Amp Momentary Switch
15 Ohm 1/2W Resistor
CR2032 Battery Holder
CR2032 Battery 
Wooden Disk 
Miniature Wooden Flower pot 
5-Minute Epoxy

 These are just the parts that I used, but you can always come up with your own design. One thing to note is that at the time I made these, I used a smaller battery and holder that has since been discontinued by Radio Shack (CR1220). If you are able to locate a CR1220 battery holder, then I would recommend using that since it's much smaller. If not, the CR2032 should work just fine since it's the same voltage, it's just larger and may not fit in the flower pot case that I used. Once I had everything wired together, I filled the pot with epoxy and then used a piece of cardboard to push the battery/battery holder into the epoxy. As the epoxy cures it gets VERY hot and so you'll want to use something other than your finger to hold the battery into the epoxy until it hardens. 

Here's a picture of the inside of a finished IR Miniature.


The Table in Action

Posted by ZombiesRComng

Hey Everyone! I finally found some time to make a few videos to show the table in action. Check them out and if you have any questions/comments please send me an e-mail at zombiesrcomng@gmail.com.


More additions to the table

Posted by ZombiesRComng

Well, the table is working better than expected, however due to the location of the computers for the GM Station and the Map Screen, you had to kneel down and almost crawl under the table in order to turn them on. The other issue was with using a USB Flash drive. As with turning on the computers, the USB ports were well underneath the table so you would have to crawl under in order to plug in the drive.


In order to solve the problem, I wired some momentary power buttons to the power buttons on the two computers and then mounted then to the edge of the table. I also picked up a cheap USB hub and mounted it to the edge of the table with velcro.


Quite a few changes...

Posted by ZombiesRComng

It's been a while since I've posted an update on here. The Gaming Table has undergone quite a few changes since the last post. I will be adding some more pics and info soon and also a video of the table in action.

Stay tuned.... :-)

Goodbye Plexi... hello Glass!!!

Posted by ZombiesRComng

After the first test gaming session, the problem with the screen fogging up was worse and also the heat from the screen caused the Plexiglas to warp in the middle. I decided that the best thing would be to replace the Plexi with actual glass. I ordered a 4' X 8' sheet to cover the entire tabletop surface. That was definitely the way to go.


Juli picked up some Scotch brand Rubber Pads from JoAnn's Fabrics and they worked perfectly


We measured and placed a pad in the corner of every square foot of the table surface


And here is the new glass gaming surface. Much better, don't you think? :-)


Here's how the screen looks through the glass. NO MORE FOGGING!!! :-D

Success!!!!

Posted by ZombiesRComng

With everything connected, I fired up the TV and computer and let it all boot up. Once it was up and running, I linked the Wiimote to the computer with the Bluetooth adapter and then calibrated it with the Smoothboard program and the IR Pen I made. Once that was all set up and working I turned on my laptop which would be used by the GM to control the map. When that had booted up, I started MapTools, opened a map I had created, and then started the server. From the Gaming Table system, I opened MapTools and then connected to the server and went into Full Screen mode. I set the zoom level to 19% from the laptop which put the squares on the screen at right about 1".


One thing that we noticed after the LCD had been on for about 10 or 15 minutes is that some condensation formed on the Plexiglas above lower part of the screen (you can see it in the first picture). Not sure what is causing that other than maybe the Plexi was cold and the heat from the screen was causing it. Maybe drilling some vent holes in that section of the plexi would help, but then stuff could fall into the holes. I'll have to investigate this further. Perhaps using actual glass might be a better option?

Now for the brain

Posted by ZombiesRComng

I picked up a cheap used computer on ebay for about $200 to use as the brain of the table. I used the same mounting technique for the computer that I used for the TV and it worked perfectly.


I then began routing the wires by screwing "o hooks" into the table, then zip tying the cables to them so they would be held in place. I used velcro to attach the wireless mouse/keyboard receiver. You can also see the wireless ethernet adapter and the Bluetooth adapter for the Wiimote.


For power, I decided on this style so that it would have plugs that would be accessible from both sides of the table easier.


Here's a shot the the underside of the table showing all the "hidden" components.

Wiimote mounted

Posted by ZombiesRComng

I had been trying to think of a way to mount the Wiimote so that it would be above the table, but I didn't really want to cut any of the ceiling tiles to do it. I found a heavy duty magnet at work with a mounting screw in the top and that gave me a great idea of how to mount the Wiimote. I used some of the metal strap to fashion a harness and then attached the magnet to the top and in about 5 minutes, I had a very sturdy mount for the Wiimote that easily attached to the metal crossbeams of the dropped ceiling.


So here is how the gaming table looks from a distance so you can see the Wiimote mounted above it.

The TV is IN!!!

Posted by ZombiesRComng

The TV fit like a glove, but it did take some ingenuity to get it into place and mounted. We put a rolling cart we had in the basement under the table and then put the TV on top of it and with it there, it was only a few inches lower than it needed to be so while I pushed the TV up into place, Juli wedged some books and magazines between the TV and the cart so that it was being held up into place very tightly. We then secured one side of the metal straps and stretched them across to the other side and then tightened them up. The TV is now mounted!! :-D


Once the TV was mounted, I then removed the protective film on the Plexiglas to admire the new screen in the table.


Here's the view from the GM's perspective.

Mounting the Plexiglas

Posted by ZombiesRComng

I figured that the best way to mount the LCD TV would be to first mount the Plexiglas to the top of the table, then hold the TV up against it from underneath and strap it to the table. So first things first... mounting the Plexi.


And the view from underneath.

Look... a hole!

Posted by ZombiesRComng

I had tried using a blade to cut the MDF top that was really thin so it did a horrible job and was taking forever. I got some double-tooth blades that cut going up and down and they cut through the MDF like butter. About 20 minutes later, I had the hole cut out. :-)


I decided to put some black duct tape around the edge to make it look a little cleaner


The frame of the table had a couple 2x4 cross braces which had to be moved out about 6" to accommodate the hole.

Construction starts...

Posted by ZombiesRComng

I had originally planned on building the table based on the design of my friend, Tom Arnott, but luckily I was able to obtain an already built table so that saved A LOT of time and money. So with the table in the basement, I layed the LCD screen I had purchased (Visio 37" 1080P) on a large piece of cardboard and then traced around the edge to make a template I could then transfer to the table to get the size of the hole correct. After cutting it to size, I centered it on the table and taped the corners down. Then I took some blue painters tape and made a frame around it on the table, then removed the cardboard and was left with a perfect sized hole template on the table.


I then used a 1" hole saw to cut out a hole in each corner so that I would have some room to use a jigsaw to make the cuts in the side.


And so it begins....

Posted by ZombiesRComng

     After playing various RPG for a few years and working with a regular dry erase mat for the maps, I began looking for some alternative methods of making use of maps. I did some searching on the web and found some sites dealing with "digital map tables". The most prevalent type that I have see all deal with various forms of projection. Either mounting a projector above the table and pointing it straight down, or mounting it under the table and bouncing it off a mirror to redirect it to the table from underneath.


This peaked my interest.

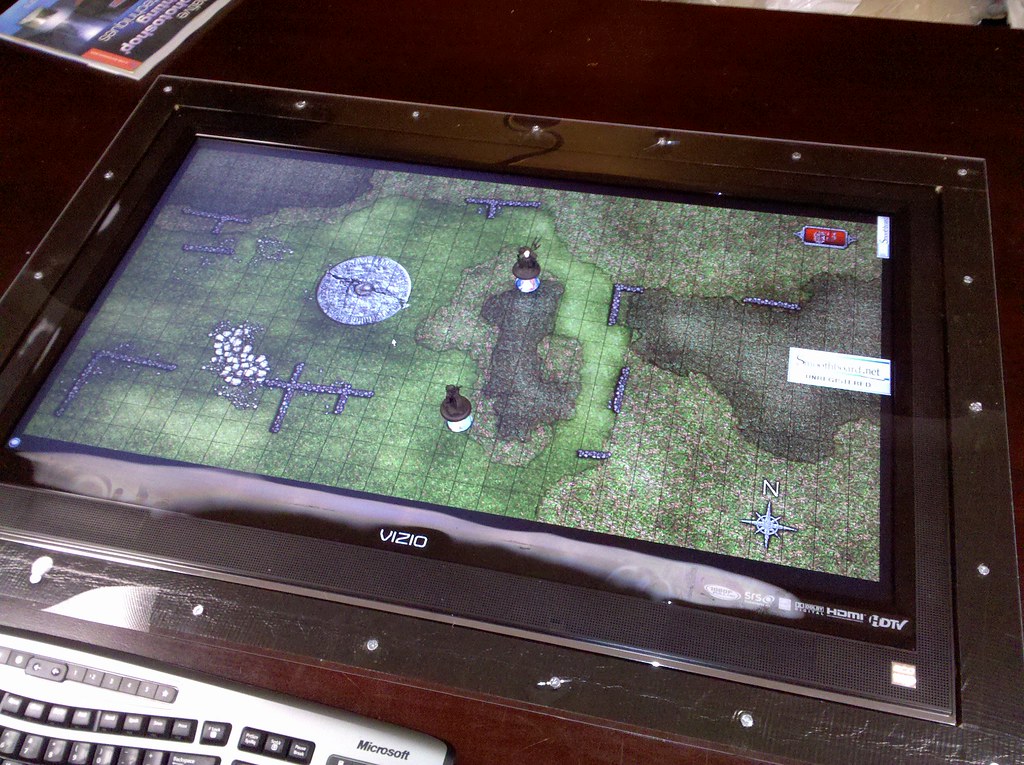
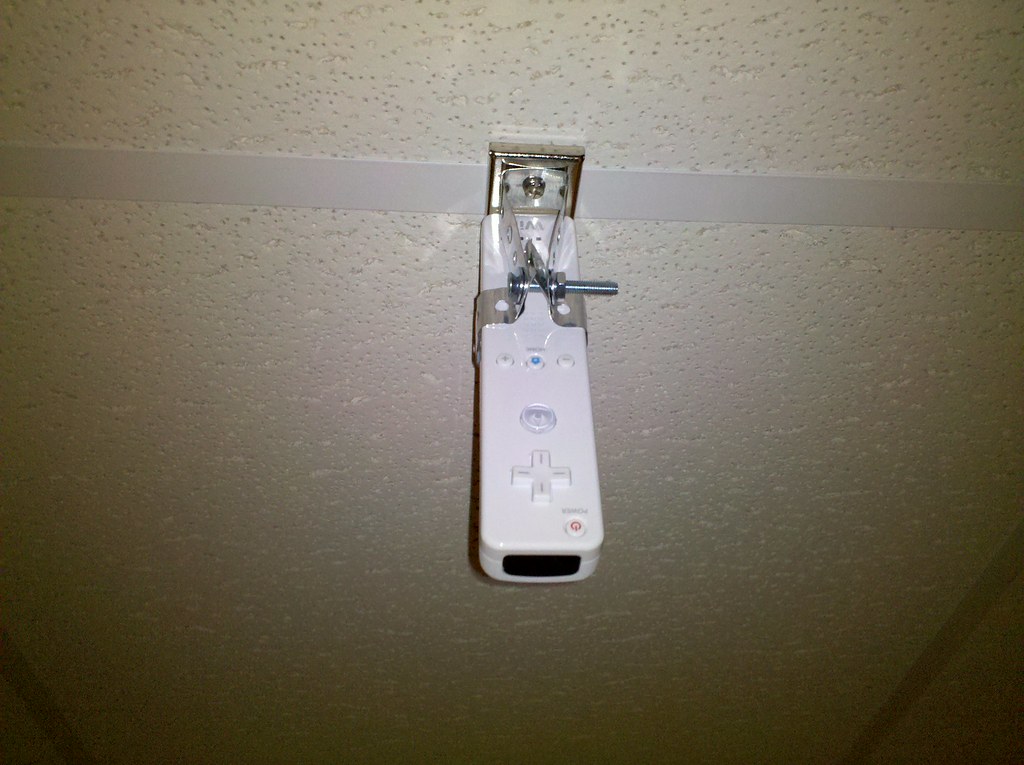
     Both of these methods looked pretty good, however the problem with projecting the image down at the table from above would make shadows on the table where the miniatures were. Also when reaching across to move the minis, it would cast a shadow on the map. While this isn't that big of a deal, it was something that I took into consideration.  After some more searching, I found some sites dealing with using an "IR Pen" and a Wiimote in order to make the map more interactive for the players, rather than just relying on the GM to move the mini's on the computer. 

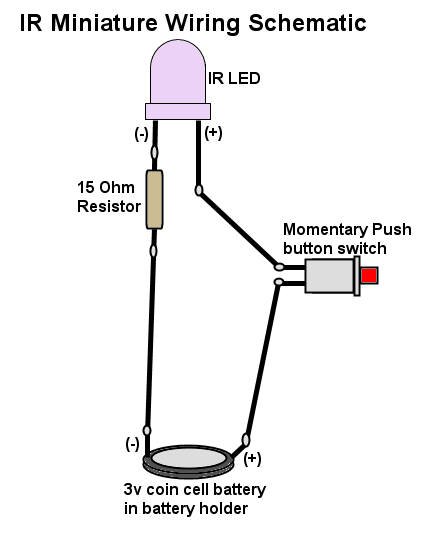
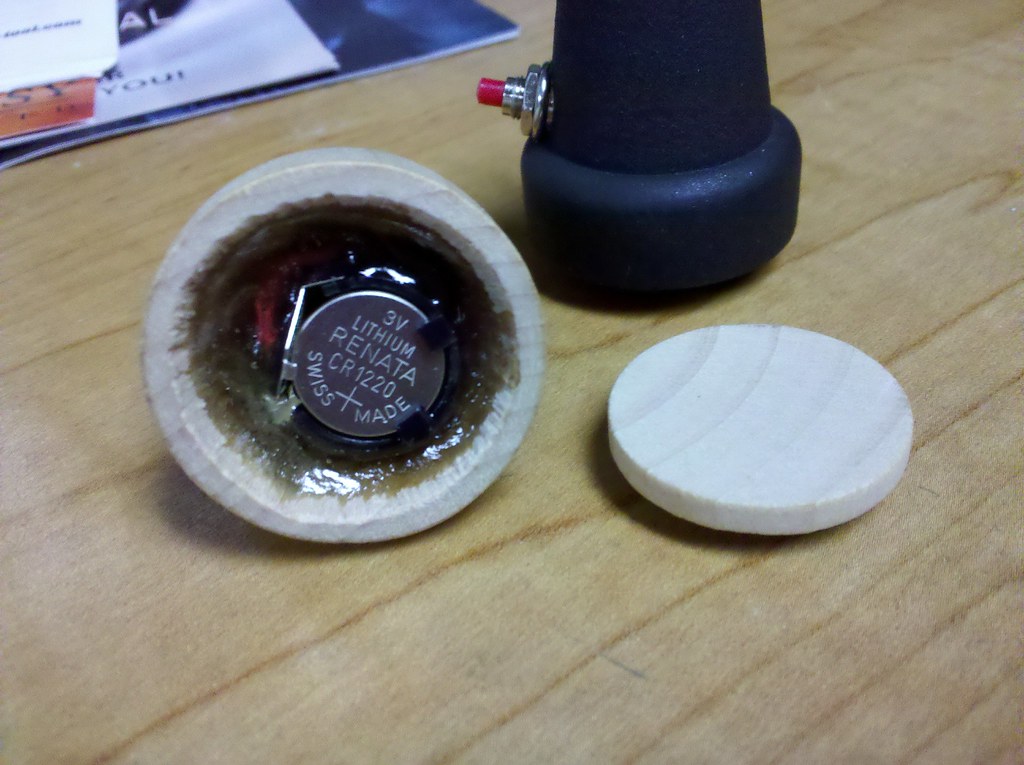
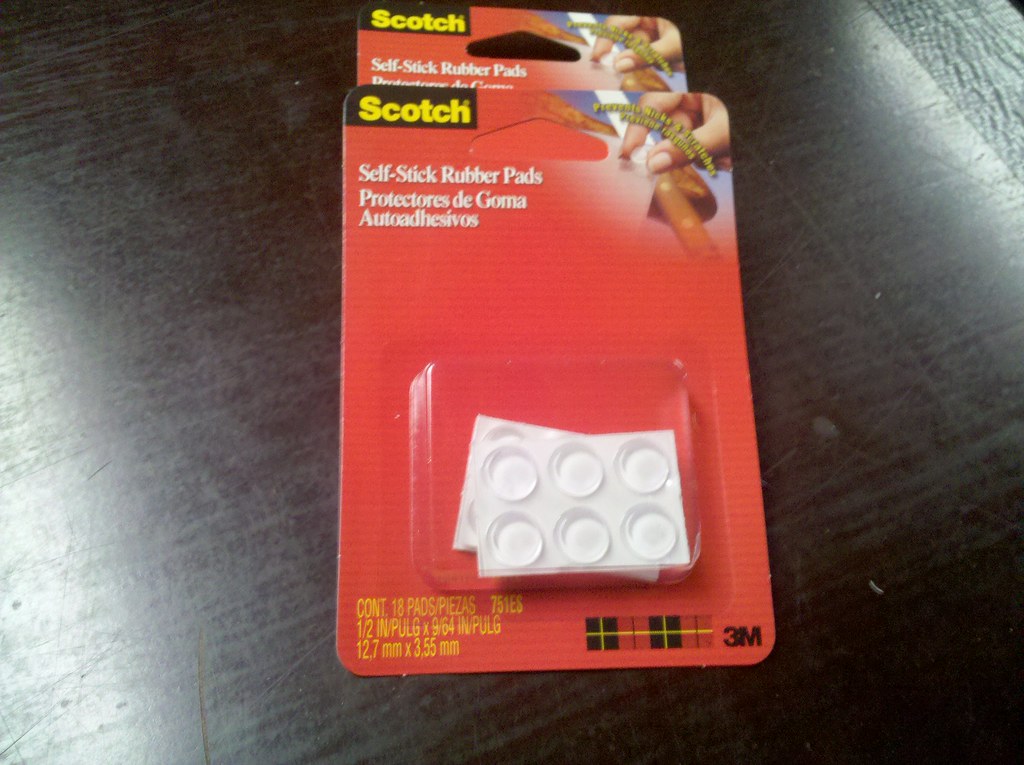
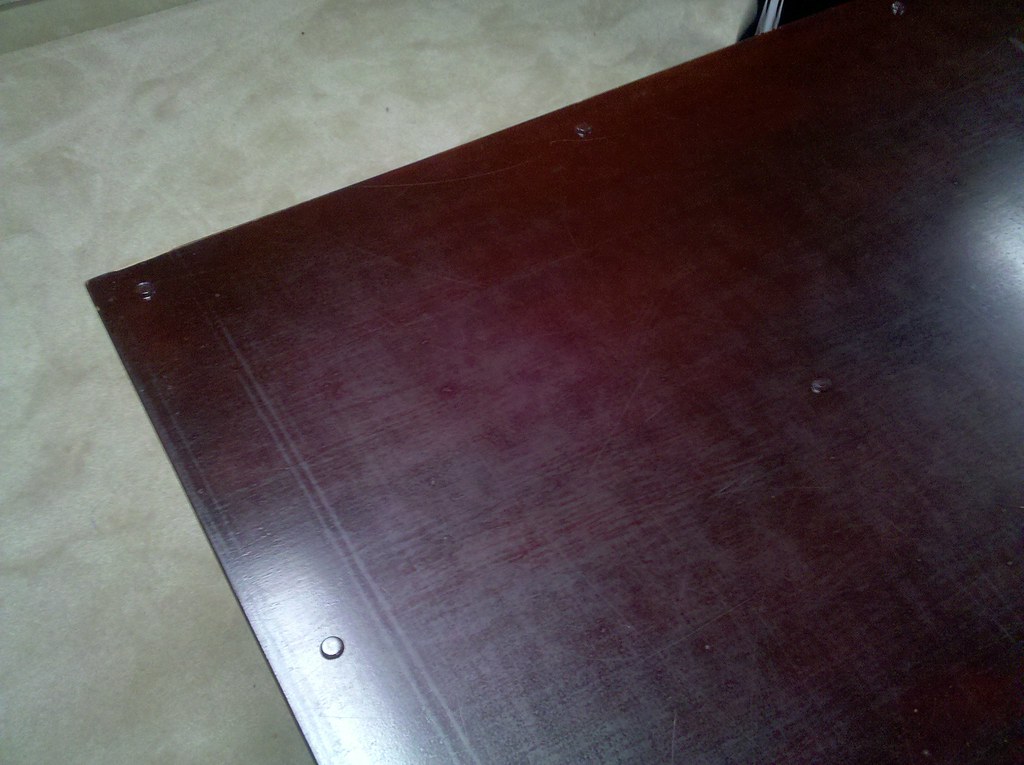
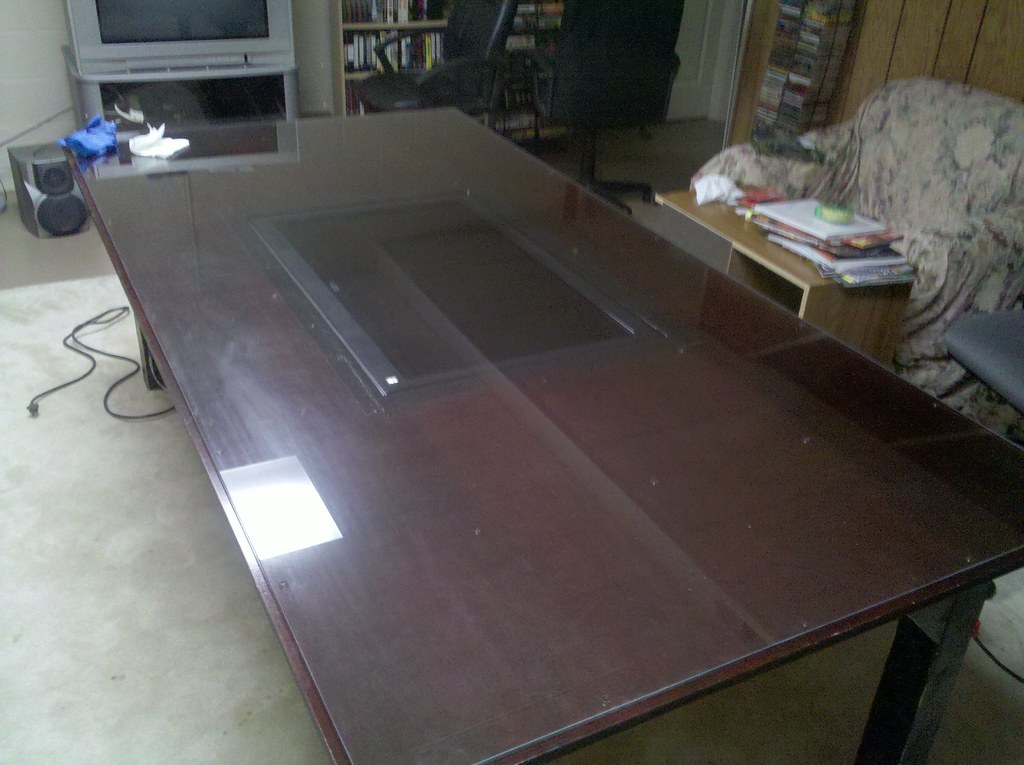
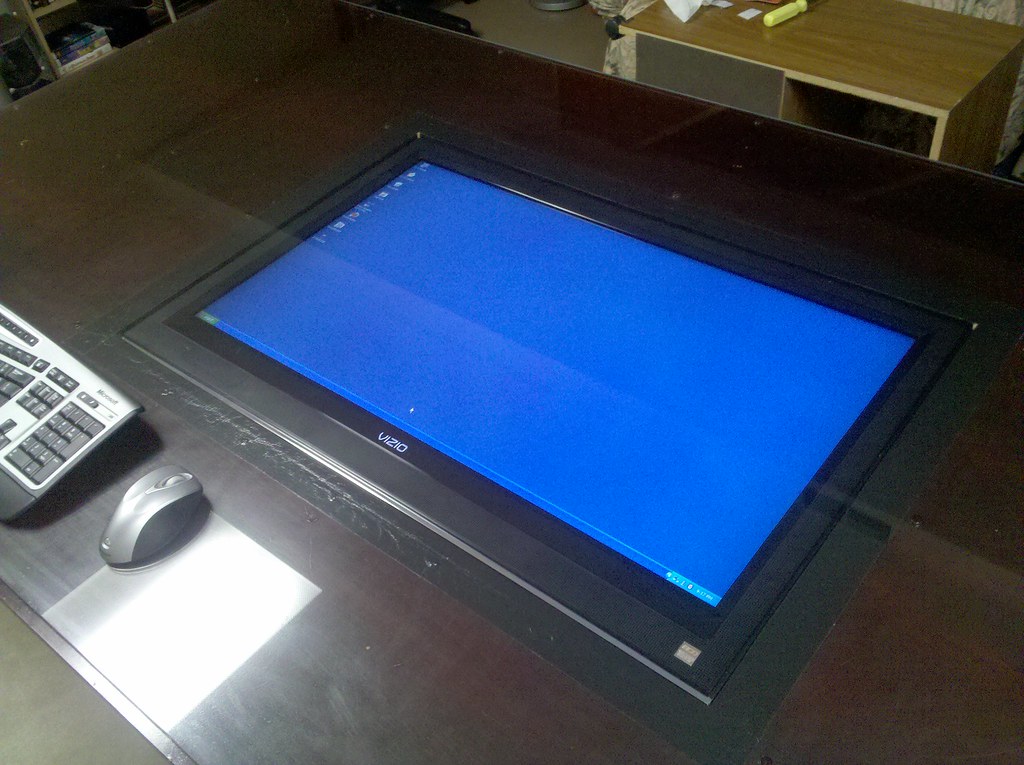
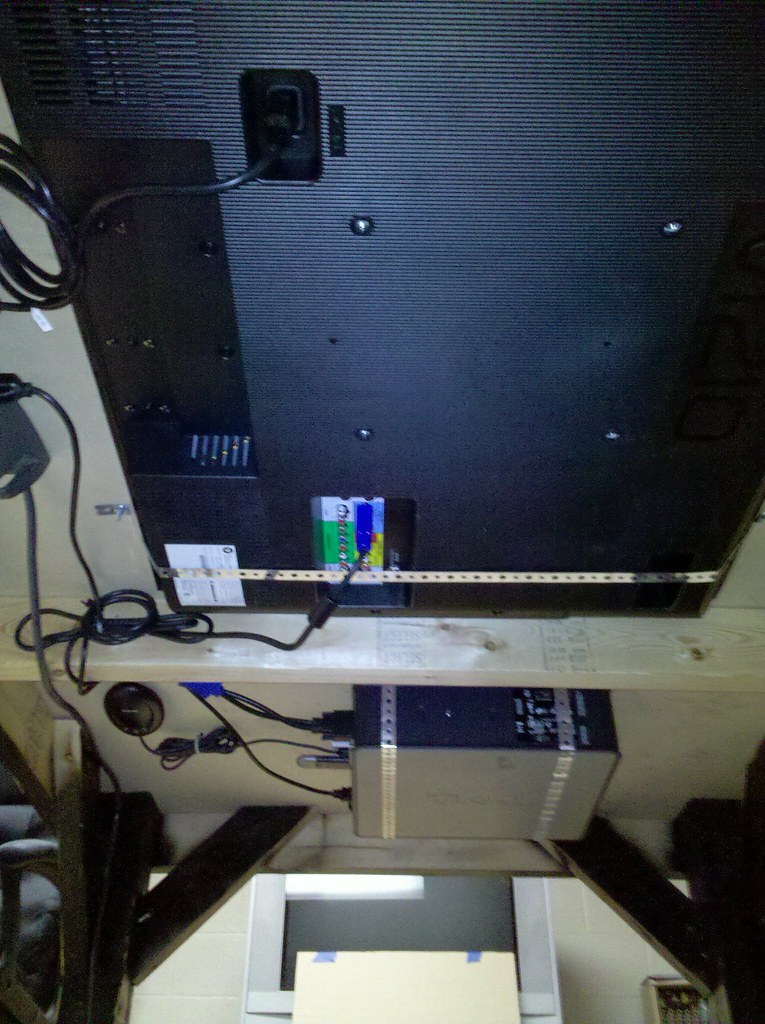
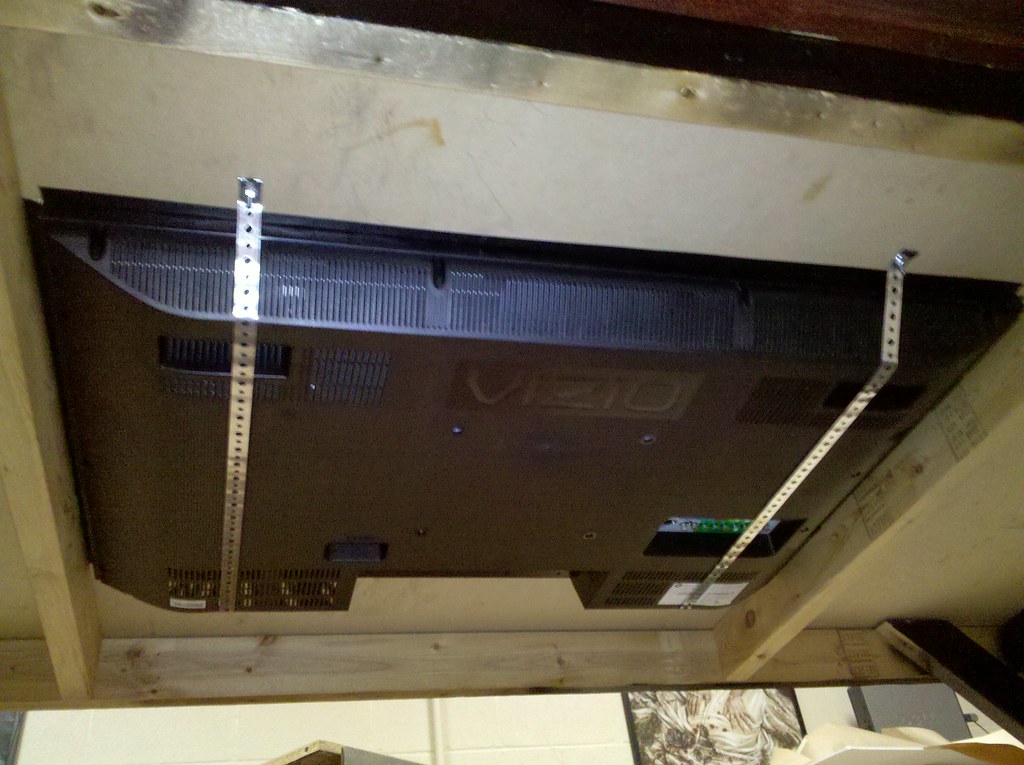
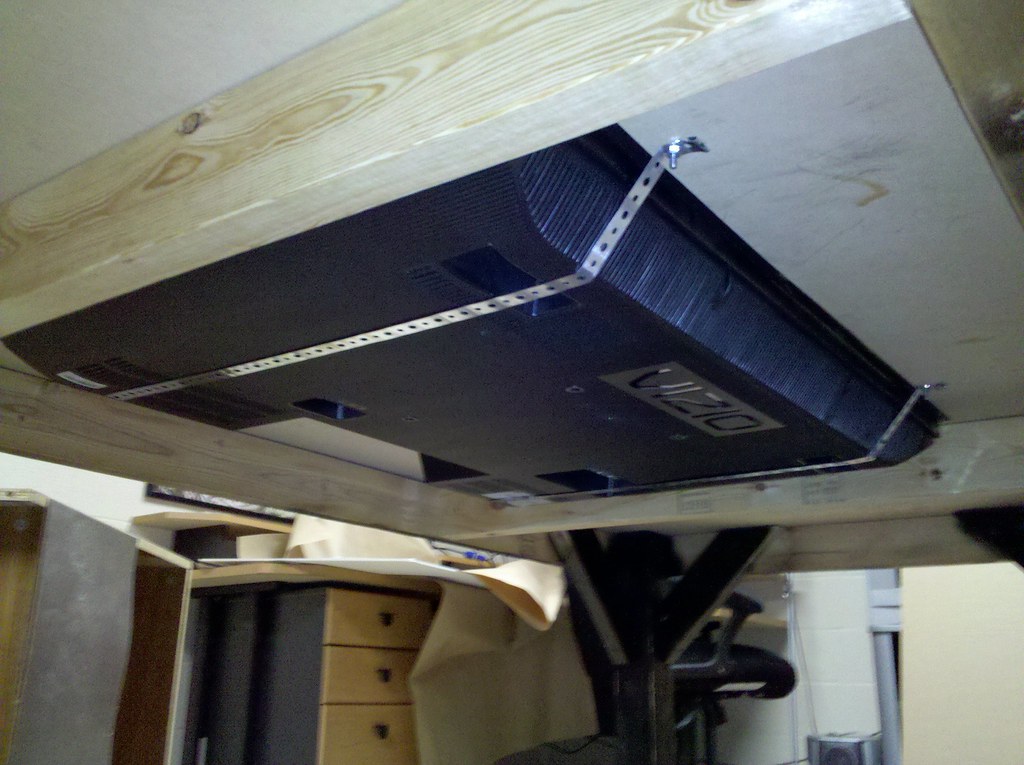
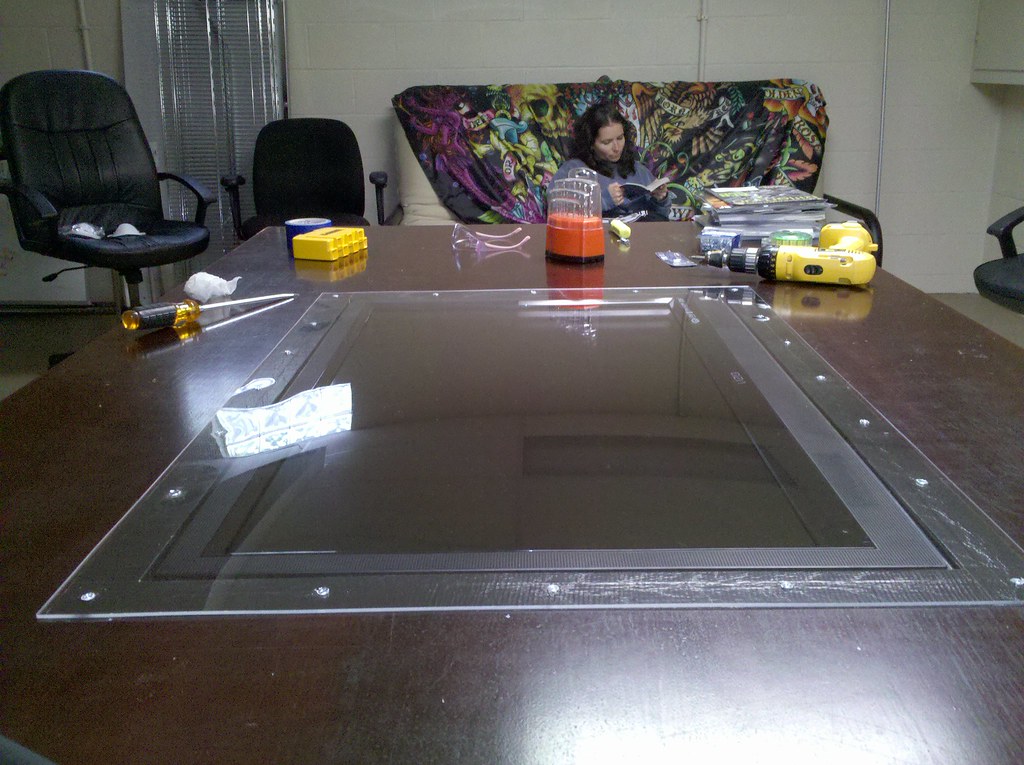
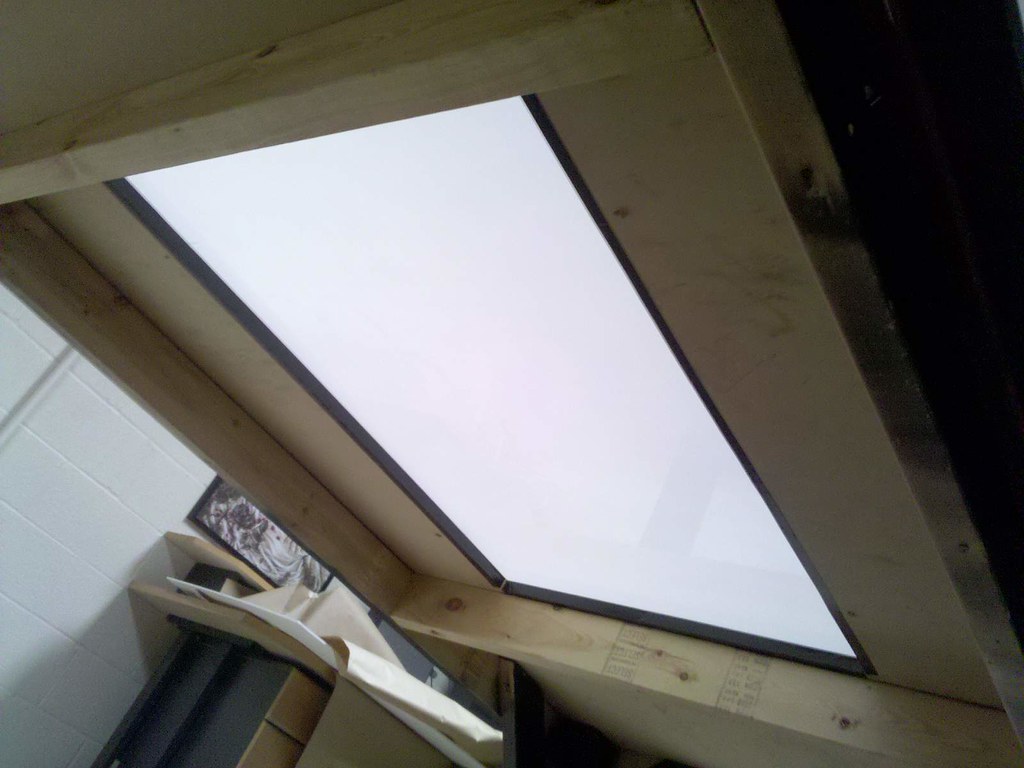
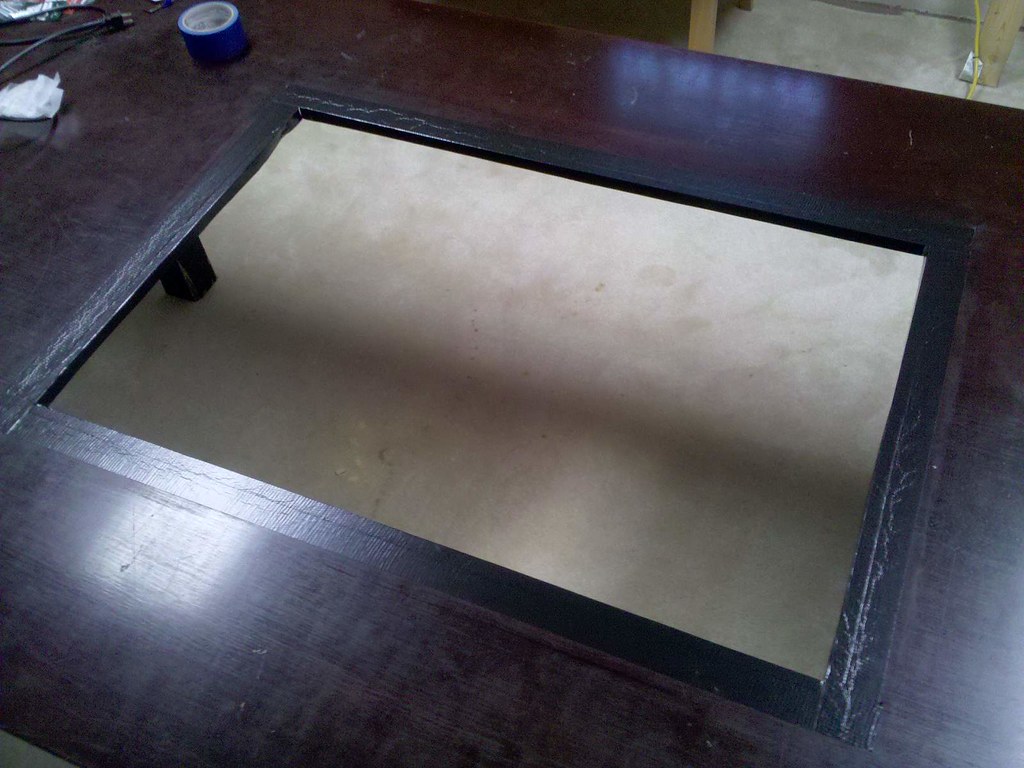
     I began by making my own IR Pen to see how it would function. It was very easy to make using some parts I picked up at Radio Shack and a pack of dry erase markers from Office Max. I won't go into a parts list because there are already WAAAY too many sites with instructions on how to make them now and you can also purchase them for under $10 from ebay.  The next thing was what type of projector I wanted to get. After reading about others who were using projectors, the throw distance was a large factor. If it was too small, the size of the overall projected image would be really tiny. There was also the problem of how to mount it, also aiming the mirror correctly. It just sounded like a lot of work. I started thinking about an LCD TV instead. I did some looking and couldn't really find any documented sites that had any pictures showing how the LCD would look in the table. I could only find a few text only posts from people saying they had done it. Most said that they just had the TV set up vertically like it would normally be and then they would just look at it to see the map. There was one who said that they just lay the TV flat on the table, but I wanted an option that was not so invasive. I didn't want to have a big screen sitting in the middle of the table. Then I started thinking what if I mount the LCD "IN" the table?
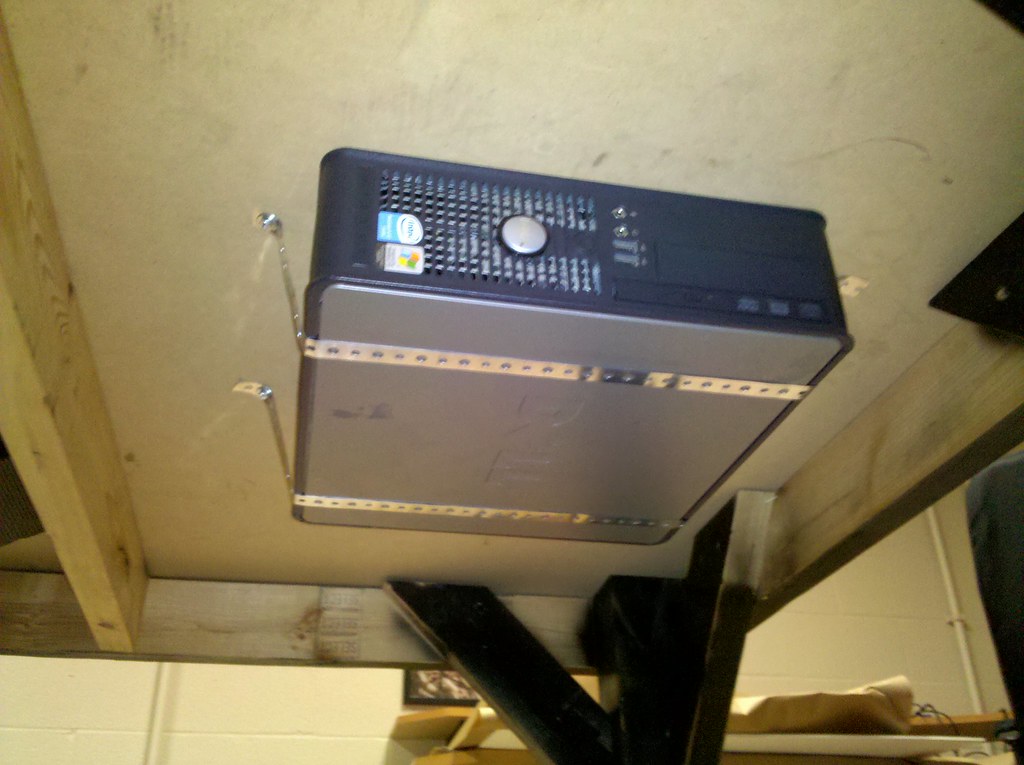
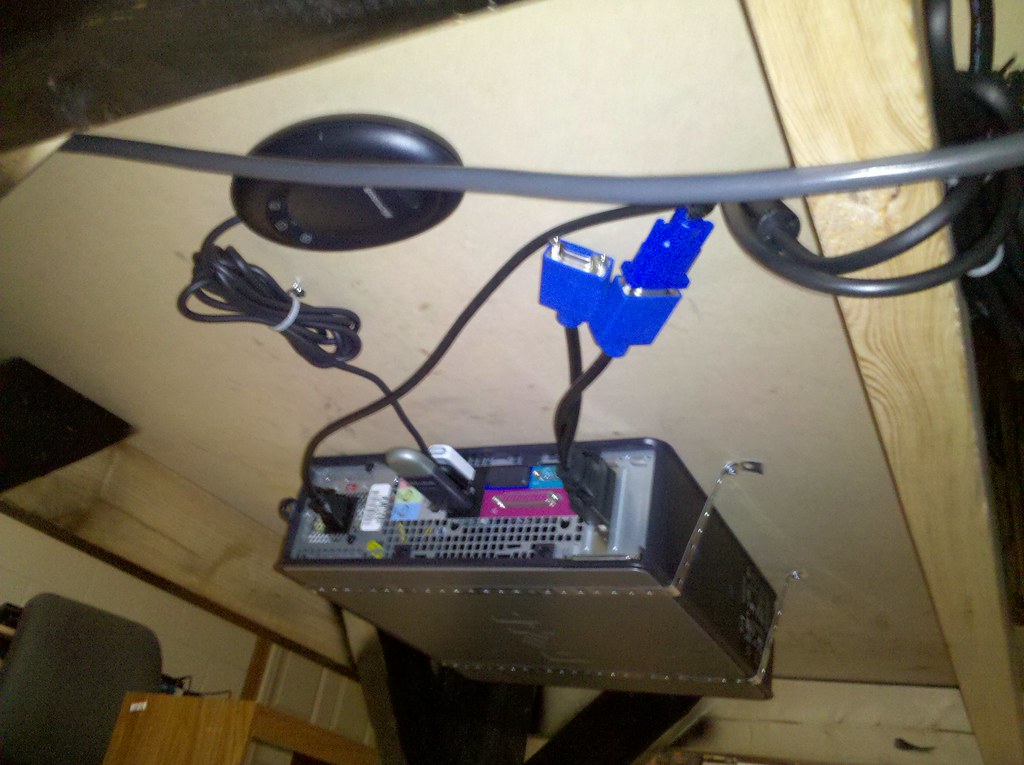
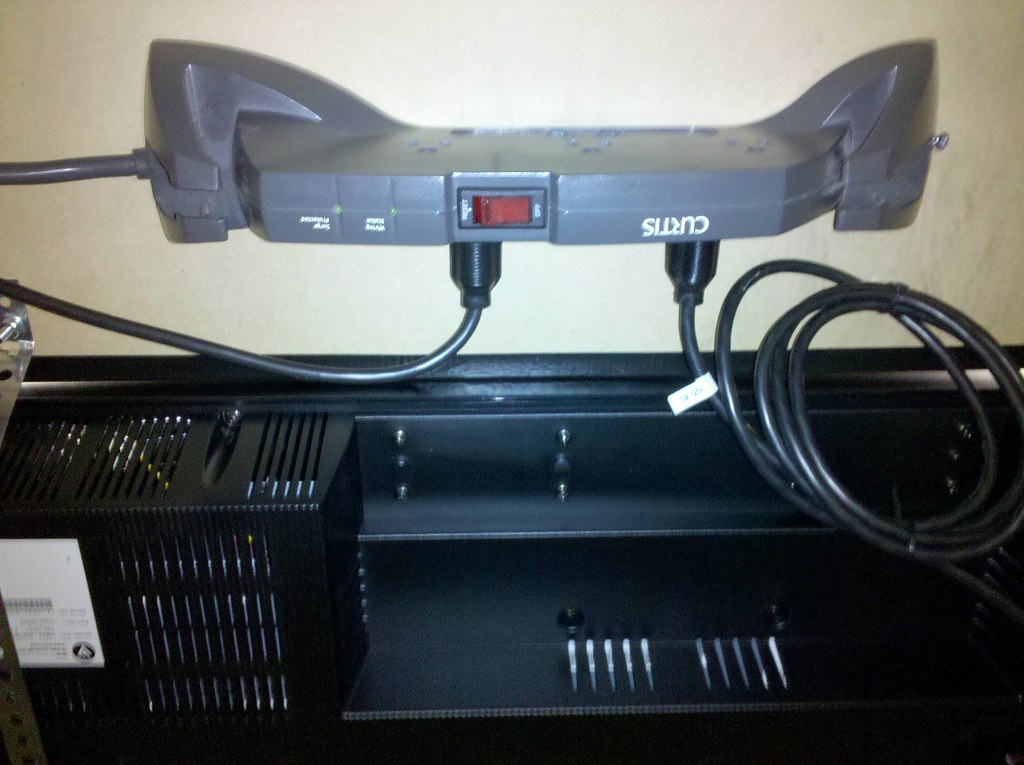
And so it began...